Loading article...
Article content
Introduction
Learning combos in MARVEL Tōkon: Fighting Souls can look complicated at first, but most routes follow the same basic structure:
Ground Confirm → Launcher → Air Combo → Extension → Wall Break
Knowing this pattern opens up the possibility of developing functional combinations with pretty much any character without having to learn totally separate sequences.
This guide details basic combo structure, the combo gauge and why EX Skill and assistance moves are important, and a usable combo for Spider-Man.
Beginner Universal Combo
A good beginner route starts with:
Crouching Medium → Standing Medium → Crouching Heavy → Jump Medium → Jump Heavy → Double Jump → Jump Heavy → Jump Heavy
The final Jump Heavy sends the opponent back toward the ground.
From there, extend with:
Assist → Dash Forward → Medium → Heavy → Jump → Medium → Heavy → Wall Break Ender
The exact ender changes depending on the character, but the overall structure stays similar.
Think of the combo in six steps:
1. Confirm - start with Medium attacks.
2. Launch - use Crouching Heavy.
3. Chase - jump after the opponent.
4. Air Combo - use Medium and Heavy attacks, then extend with a double jump.
5. Extend - use an assist or character-specific Skill.
6. Break - carry the opponent to the wall and finish with the appropriate Break option.
The important thing is learning the structure, not memorizing one exact sequence for every character.
The Universal Combo Is a Template
Not every single attack or wall-break is always equal depending on the characters. Spider-Man is very friendly with aerial extensions, meanwhile you’ll be better off with other Skills for characters like Doctor Doom, Green Goblin, or Danger to complement some mobility and certain enders.
If the beginner-route no longer functions with another character, you generally only need to swap out what does not make sense for the character - not find a whole new combo route. Same structure, different tool.
How the Combo Gauge Works
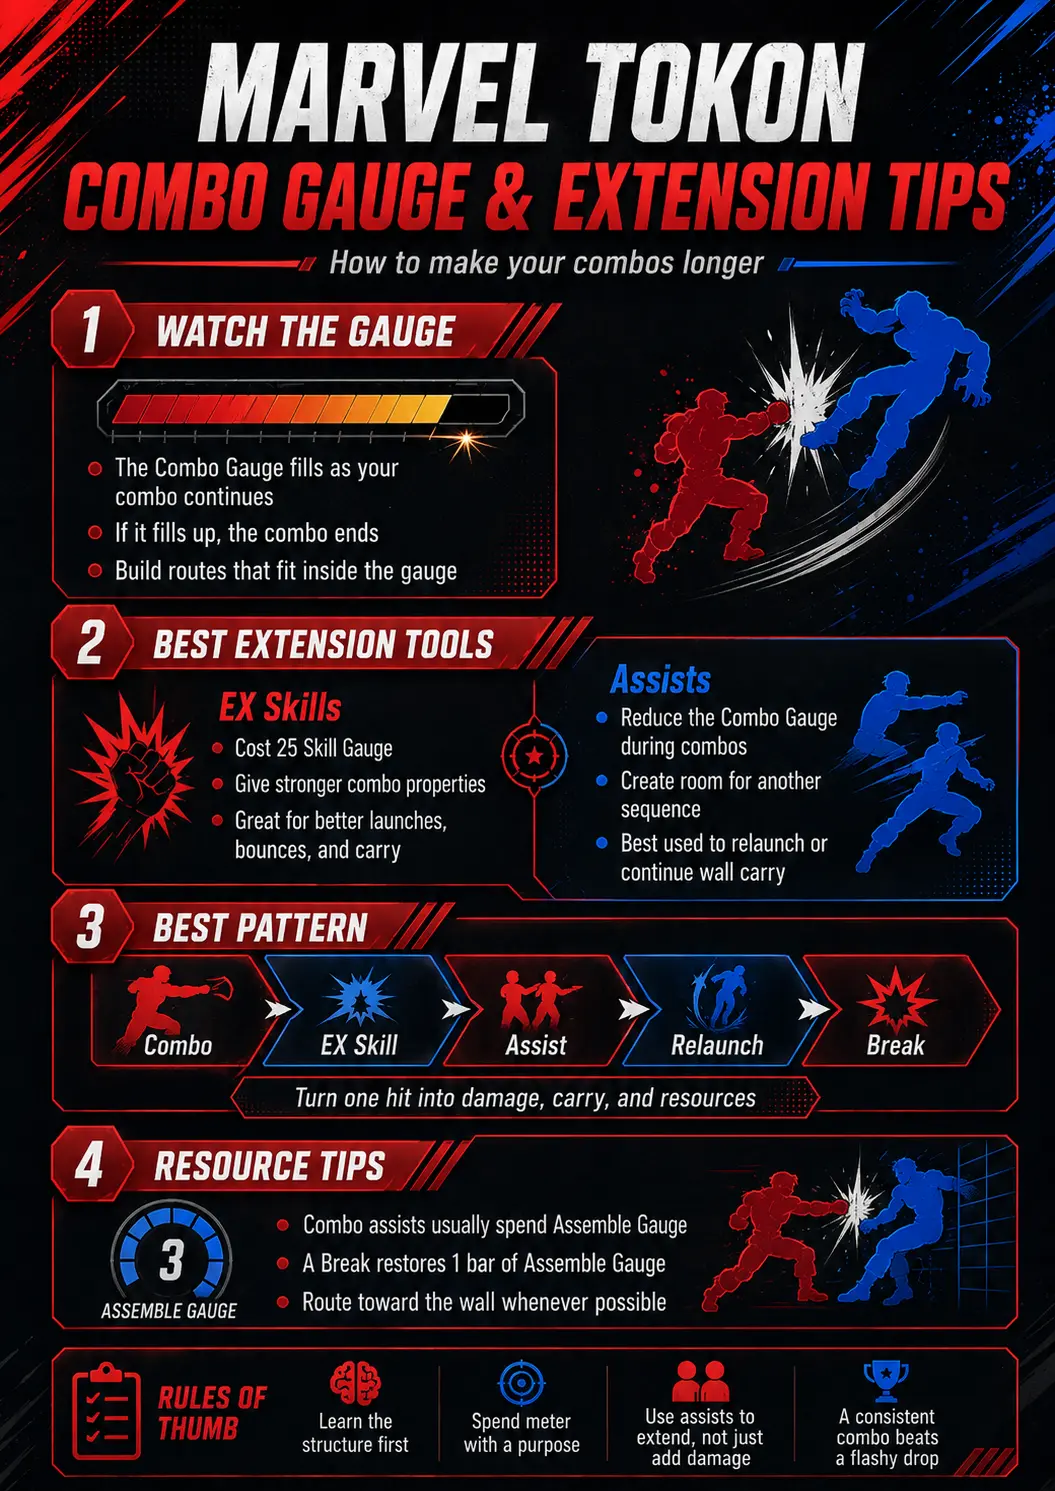
The Combo Gauge determines how long you can keep a combo going. Each attack fills the gauge, and once it reaches its limit, the opponent will eventually break free. Because of this, successful combos are about more than simply landing as many hits as possible.
You want to fit as much useful offense as possible into the available Combo Gauge:
- damage;
- wall carry;
- assist extensions;
- resource gain;
- and a strong ender.
This is where EX Skills and assists become important.
EX Skills and Assists Make Longer Combos Possible
EX Skills cost 25 Skill Gauge, but they generally offer stronger combo properties, such as better launches, increased hitstun, bounces, or improved positioning.
They can also help extend combos without increasing the Combo Gauge as much as normal attacks or regular Skills. If your combo keeps ending just before a wall-break sequence, try replacing part of the route with an EX Skill.
Assists are equally important. During a combo, calling an assist can reduce the Combo Gauge, giving you more room to continue your offense.
That creates one of the most useful combo patterns in Tōkon:
Combo → Skill → Assist → Relaunch → Second Combo
Instead of using an assist only for extra damage, use it to create an entirely new section of the combo.
Why Wall Breaks Matter
Wall breaks are more than just flashy finishers. Successfully landing a Break can unlock another member of your team and restore one bar of Assemble Gauge. That creates an important resource loop:
Spend Assemble Gauge on a combo assist → carry the opponent to the wall → trigger a Break → recover Assemble Gauge
This is why spending resources during a successful hit can be much stronger than simply saving everything. A combo that reaches the wall may be more valuable than a slightly higher-damage route that leaves the opponent midscreen.
Spider-Man Combo Guide
Spider-Man is a good example of how the basic combo structure turns into a more advanced character-specific route.
Start with:
Medium → Heavy
Then:
Unique → Quick Skill + Heavy
Spider-Man moves upward and pulls himself toward the opponent.
While airborne:
Medium → Quick Skill + Heavy
From there, continue with:
Back + Quick Skill + Medium → Hold Forward → Quick Skill + Medium
Holding Forward is important because it keeps Spider-Man close to the opponent.
Try to perform the final Quick Skill + Medium relatively low to the ground so the next section connects consistently.
Relaunch
Once Spider-Man lands:
Heavy → Crouching Heavy
Immediately jump after the opponent and perform:
Jump Heavy → Double Jump → Jump Heavy
Notice that this is the same basic structure as the beginner combo:
Ground Attack → Launcher → Air Combo
The difference is that Spider-Man adds character-specific movement and Skills before the launcher.
Wall Sequence
After the second Jump Heavy:
Back Quick Skill → Back Quick Skill + Medium → Back Quick Skill + Heavy
Perform the follow-ups quickly as Spider-Man returns toward the ground.
This section carries the opponent into the wall interaction and prepares the final ender.
Ultimate Ender
Spider-Man can finish with Radioactive Spider, his Ultimate Skill.
After the final Back Quick Skill + Heavy, watch for Spider-Man to begin moving forward and input the Ultimate.
The complete route follows this general structure:
Medium → Heavy → Unique Movement → Skill Extension → Air Extension → Ground Reposition → Heavy → Crouching Heavy → Air Combo → Wall Sequence → Ultimate
With the right starter and positioning, this type of solo Spider-Man route can reach around 61,000 damage without an assist.
Do not worry about reaching that number immediately.
A slightly weaker combo that you can land consistently is much more useful in a real match.
How to Practice Combos Efficiently
Do not practice a long combo from the first hit every time.
Split it into sections.
For Spider-Man:
Section 1: Medium → Heavy → Unique → Quick Skill + Heavy
Section 2: Air Medium → Quick Skill + Heavy → Back Quick Skill + Medium → Forward continuation
Section 3: Heavy → Crouching Heavy → Jump Heavy → Double Jump → Jump Heavy
Section 4: Wall sequence
Section 5: Wall sequence → Ultimate
Practice each section separately, then connect them.
This is much faster than restarting the entire combo every time you miss one difficult transition.
5 Rules for Better Marvel Tōkon Combos
1. Learn the structure first. Think: Confirm → Launch → Air Combo → Extension → Break.
2. Watch the Combo Gauge. The hit counter matters less than how much combo capacity you have left.
3. Use EX Skills intelligently. They cost meter, but they can create much stronger extensions.
4. Use assists to extend, not just add damage. Their Combo Gauge reduction can give you room for another full sequence.
5. Route toward the wall. A Break can recover Assemble Gauge and improve your overall match situation.
Final Tips
The fastest way to improve at Marvel Tōkon combos is to understand the system instead of memorizing giant strings.
- Start with: Ground Confirm → Crouching Heavy → Air Combo
- Add one layer at a time.
- Learn your character's best Skill extension.
- Add an EX Skill.
Once you understand those pieces, long Tōkon combos become much easier to read and build.
What first looks like thirty random attacks becomes:
Confirm → Launcher → Air Route → Extension → Relaunch → Wall Break
And that is the foundation of Marvel Tōkon's combo system.